|
|
|
|||||||||||||


|
||||||||||||
|
|||||||||||
| Features | Download | Order Now | Screenshots | How To Use | ||
System requirementsPlatform:
Hardware requirements:
Getting Started
When you first start the program you need to add computers of your network to the list. Network Inventory Monitor provides three ways to scan your network:
Also, you can add computers to the list manually one-by-one.
Enumerate network for all computersNetwork Inventory Monitor enables you to scan all available computers on your network with just one click. To enumerate all computers on your network perform the following steps:
Add computers by range of IP addressesSometimes you need to scan available computers within a particular range of IP addresses. Just provide the starting address, the last IP address and Network Inventory Monitor will scan all available computers between that range of IP addresses. To add computers by range of IP addresses perform the following steps:
Add computers manuallyTo add computers manually you should click "New Computer" button from the toolbar or press "Ctrl+N". Then type a host name of the computer and click "Ok" button.
How to delete computersTo delete computers press "Del" key or select menu "Computer" -> "Delete Computer". Then selected computers will be deleted from the list.
How to get information from remote PCYou can get information from remote computer through "NIM User" agent (agent-based method). Just select computers you want to scan and click "Get/Update Info" button from the toolbar or press "Ctrl+I". This will start scanning remote computers.
How to use custom columnsYou can use custom columns for storing your custom information, for example serial number, phone number, etc... To edit data in custom column click "Edit Custom Column" button from the toolbar or click "Ctrl+E". 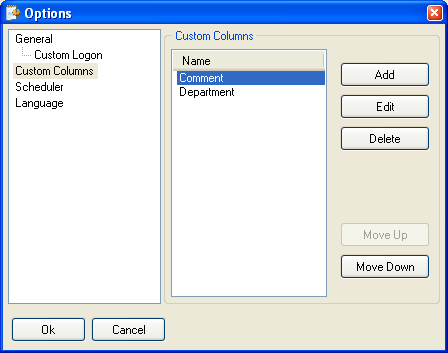
To manage custom columns select menu "File" -> "Options". Then select "Custom Columns". In the window "Options" you can add, delete or move custom columns up or down.
How to create reportNetwork Inventory Monitor provides four types of reports:
All that you need is to select report type in menu "Report", then mark information which you want to add to the report. To save settings made for report mark "Save Settings" check box. 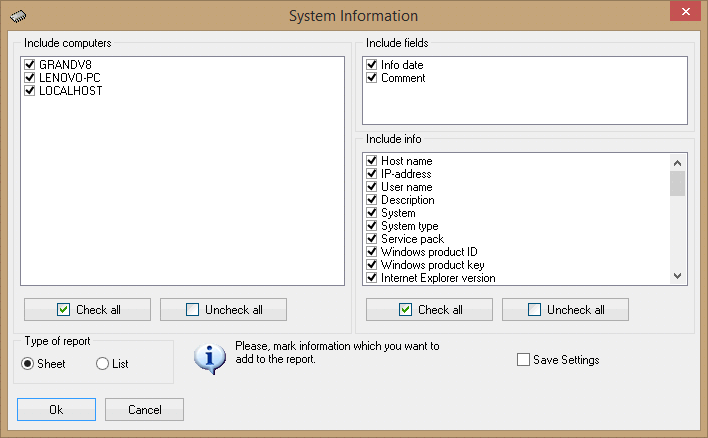
You can export reports in HTML, MS Excel and RTF formats. Example of list-style report: Report. Example of sheet-style report: Report.
How to use schedulerTo enable scan schedule select menu "File" -> "Options", then select "Scheduler". 
All you need is to set up next scan time and period of scans. |
|
||||||||||||||
|
Copyright © 2002-2024 Kviptech. All rights reserved.
Privacy
| Contact
|
||